How to integrate AWS SES with PHP – PHPMailer
In this article we will look in to, how to implement amazon AWS SES (simple email service) in PHP using PHPMailer library.
Register with AWS
Step 1: Register with AWS and verify your primary email. If you are a new user then by default AWS will give you limited access as an SES sandbox account. this might be enough for testing. But when you want to deploy the application in production then it will be a bit difficult, so after testing, request for production where you will get much more flexibility to use and more emails to send.
Step 2:
1. go to the AWS console dashboard and navigate to the AWS SES service page.
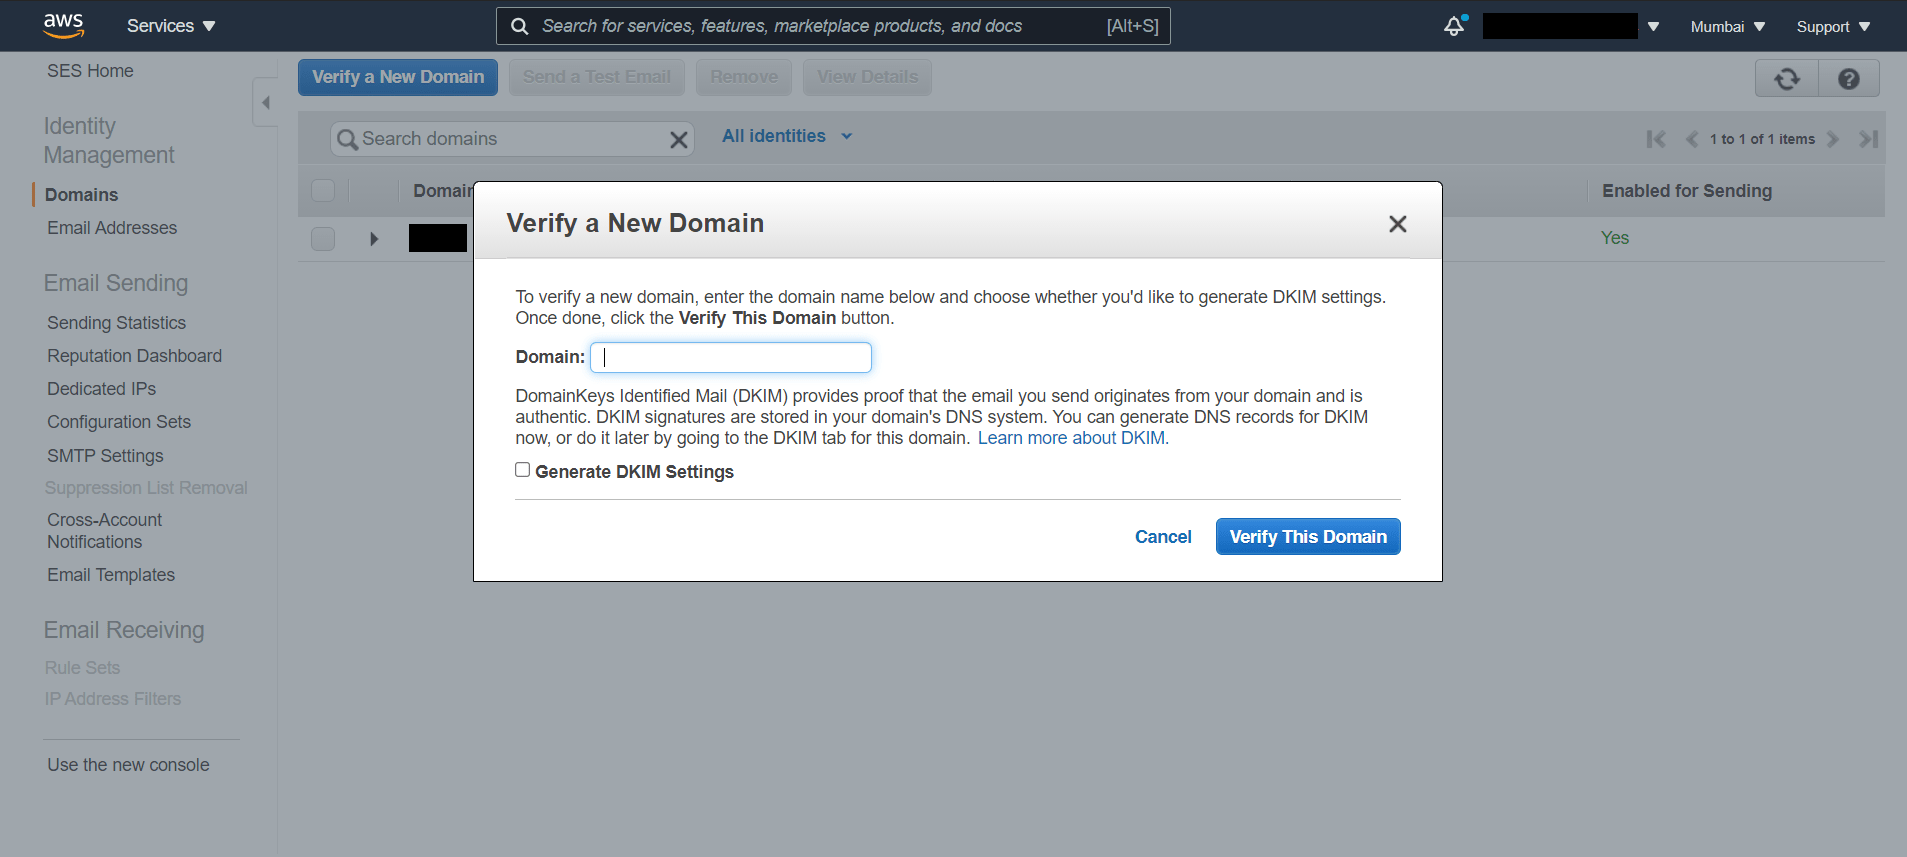
2. (this is optional) Then click on the domain and verify your domain, only if you want to send the email through your domain emails else not needed. after you enter your domain then click verify this domain. then you will get some TXT and CNAME configuration which you need to add to your domain DNS records to verify your domain.
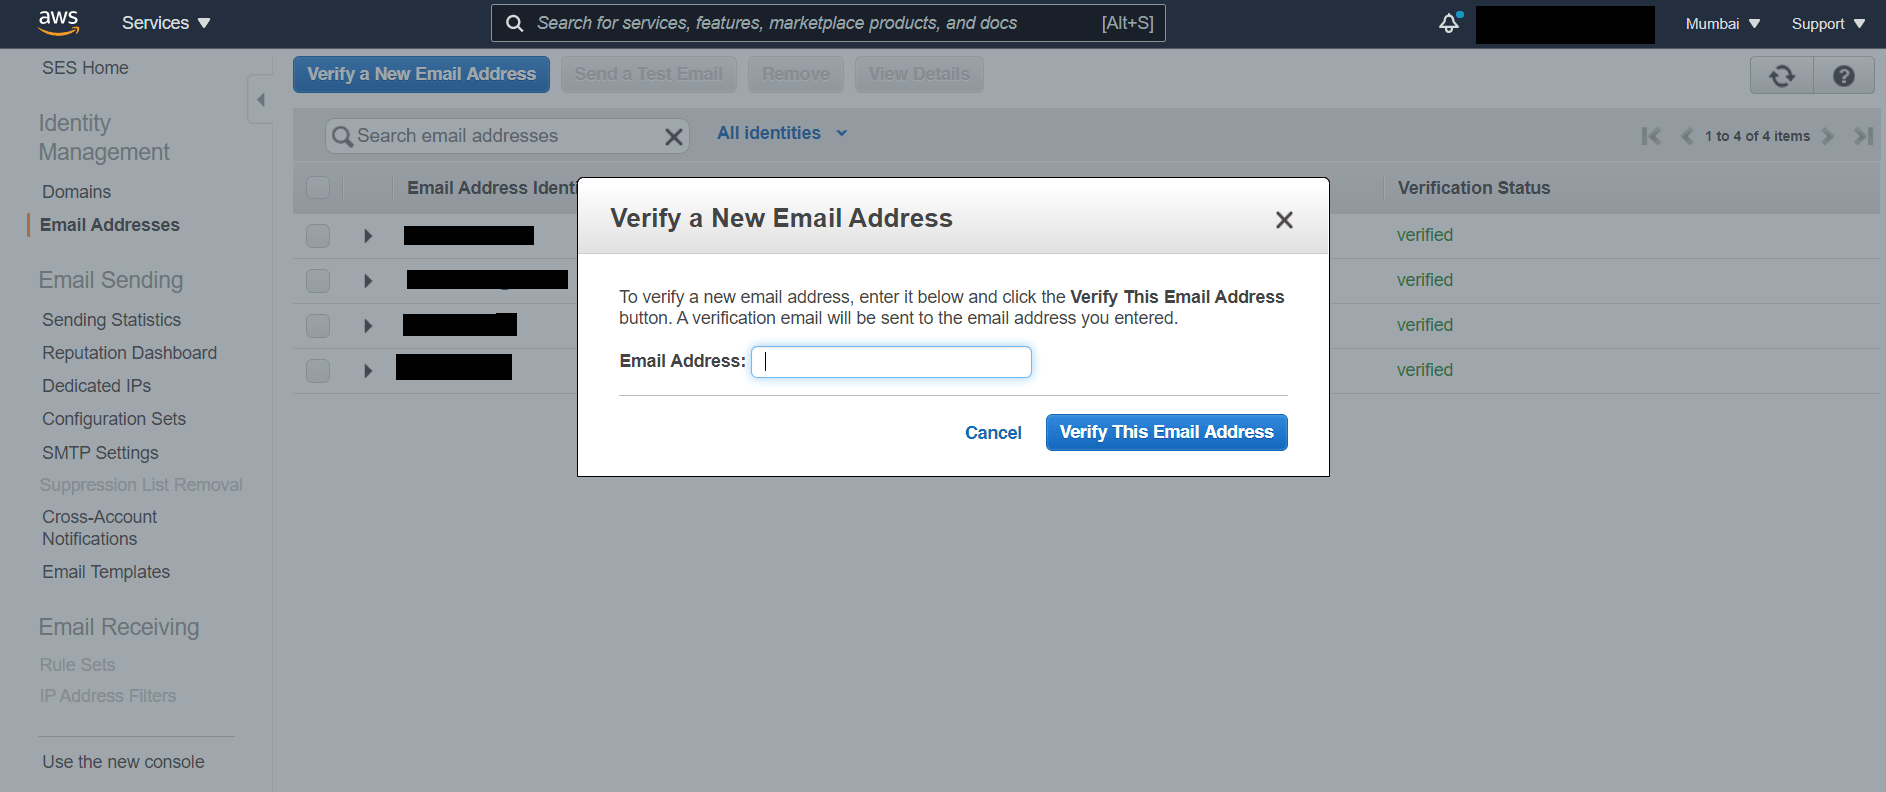
3. next, Verify all your email ids from which you want to send emails to your customers. After adding you will receive emails on all email ids to verify, so verify all of them.
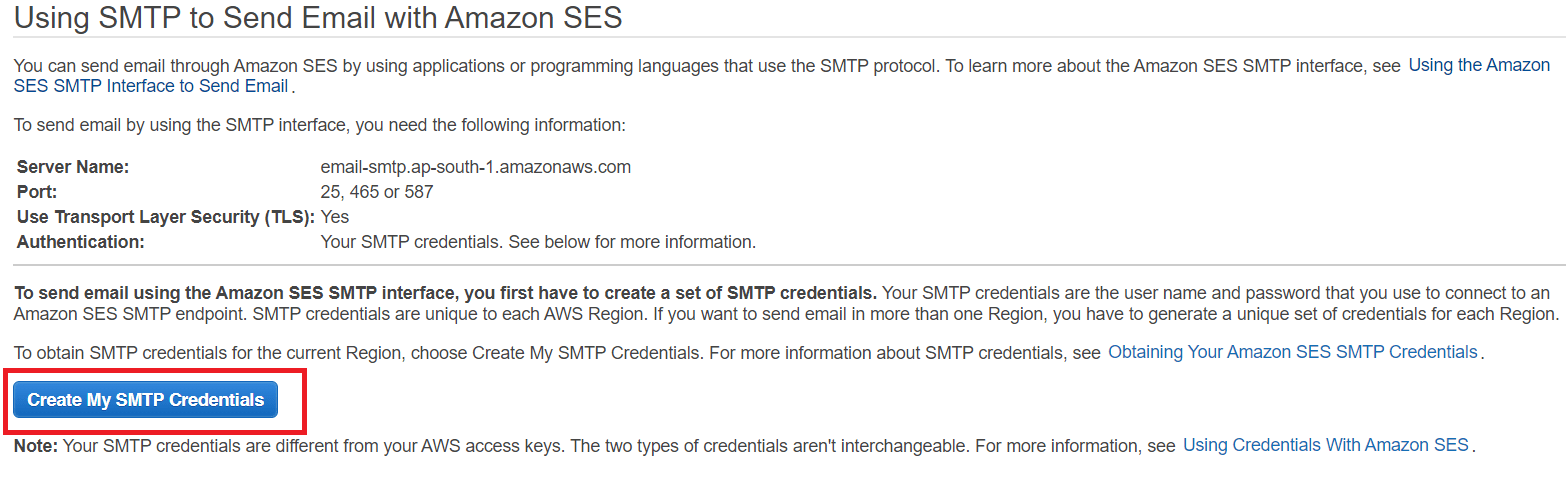
4. next, goto SMTP settings and click on “Create my SMTP credentials” and create an IAM user and assign to AWS SES and copy the username and password and keep. other than credentials all SES connecting server details will also be there on that screen only. as shown below
Step 3: Here in this article we are using a PHP library called PHPMailer for simple integration.
next download PHPMailer library from this GitHub link to download
PHPMailer Code Snippet
Step 4: in the Below code replace the SMTP server setting as mentioned in the above image, please use the SMTP server hostname as it is mentioned in your SMTP settings don’t use the above mentioned.
<?php
// Import PHPMailer classes into the global namespace
// These must be at the top of your script, not inside a function
use PHPMailer\PHPMailer\PHPMailer;
use PHPMailer\PHPMailer\Exception;

// If necessary, modify the path in the required statement below to refer to the
// location of your Composer autoload.php file.
require 'PHPMailer/src/Exception.php';
require 'PHPMailer/src/PHPMailer.php';
require 'PHPMailer/src/SMTP.php';

// This email address must be verified with Amazon SES to send.
$sender = 'Enter Sender email address here ';
$senderName = 'Enter sender name';

// is still in the sandbox, this address must be verified.
$recipient = 'Enter recipient email address here;

// Replace smtp_username with your Amazon SES SMTP user name.
$username = 'Enter AWS SES IAM username';

// Replace smtp_password with your Amazon SES SMTP password.
$password = 'Enter AWS SES IAM password';


// If you're using Amazon SES in a region other than US West (Oregon),
// replace email-smtp.us-west-2.amazonaws.com with the Amazon SES SMTP
// endpoint in the appropriate region.
$host = 'Enter AWS SES SMTP server url '; // please enter you endpoint
$port = 587;

// The subject line of the email
$subject = 'Enter email subject line';

// If you are sending The plain-text body of the email then uncomment below code line
//$bodyText =  "-- Put body text here --";

// The HTML-formatted body of the email
$bodyHtml = 'Enter body html here';

$mail = new PHPMailer(true);

try {
    // Specify the SMTP settings.
    $mail->isSMTP();
    $mail->setFrom($sender, $senderName);
    $mail->Username   = $username;
    $mail->Password   = $password;
    $mail->Host       = $host;
    $mail->Port       = $port;
    $mail->SMTPAuth   = true;
    $mail->SMTPSecure = 'tls';
  //  $mail->addCustomHeader('X-SES-CONFIGURATION-SET', $configurationSet);

    // Specify the message recipients.
    $mail->addAddress($recipient);
    // You can also add CC, BCC, and additional To recipients here.

    //If you want to send reply to specific email , then use below code for Reply To
    $mail->ClearReplyTos();
    $mail->addReplyTo('Enter Reply to Email here', 'Enter Reply to name here');

    //Add attachments
    $mail->addAttachment('/tmp/image.jpg', 'new.jpg');    //Optional name

    // Specify the content of the message.
    $mail->isHTML(true);
    $mail->Subject    = $subject;
    $mail->Body       = $bodyHtml;
    $mail->AltBody    = $bodyText;
    $mail->Send();
    echo "Email sent successfully!";
} catch (phpmailerException $e) {
    echo "An error occurred. {$e->errorMessage()}", PHP_EOL; //Catch errors from PHPMailer.
} catch (Exception $e) {
    echo "Email not sent. {$mail->ErrorInfo}", PHP_EOL; //Catch errors from Amazon SES.
}
?>
Please reach out to us if you have any questions, comment down below.
Arjun is a Full-stack developer, who is fond of the web. Lives in Chikmagalur, Karnataka, India