How to configure SQL server to access it remotely
Configuring Windows Firewall
From the Control Panel choose Windows Firewall and click the Advanced settings or just type wf.msc in Search program and files from the Start menu:
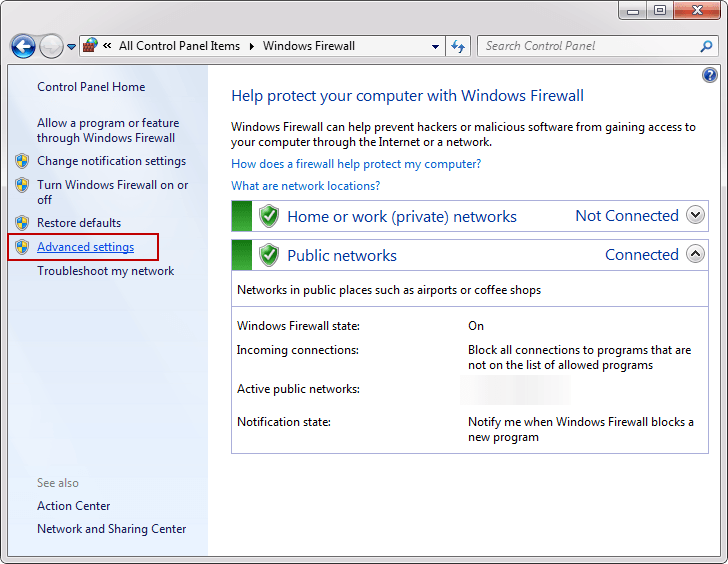
- Inbound Rules: You can allow or block traffic attempts to access the computer that matches certain criteria in the rule. By default inbound traffic is blocked, to allow traffic to access computer, you need to create an inbound rule.
- Outbound Rules: You can allow or block traffic originating from specifying computer creating rules. By default outbound traffic is allowed, so you need to create the rule that blocks outbound traffic.
In the Windows Firewall with Advanced Security, click the Inbound Rules from the left pane, right-click Inbound Rules and select the New Rule or from the Actions pane click the New Rule:
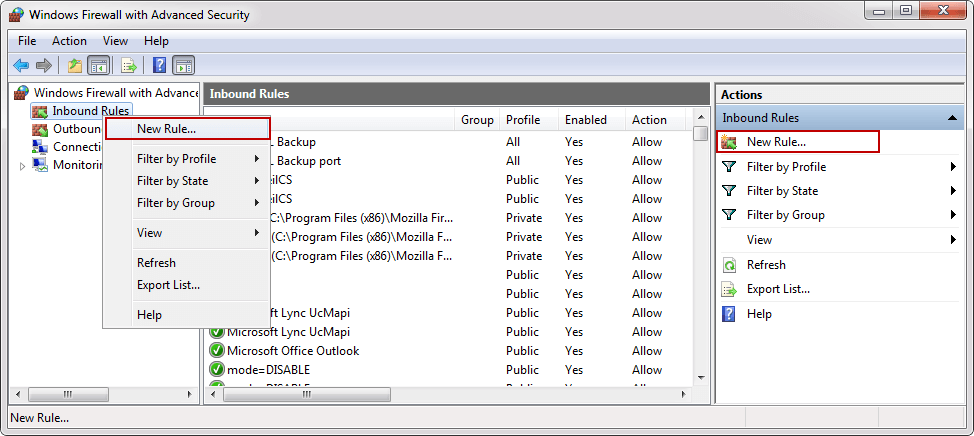
On which you will click, it’s up to you. In both cases, the New Inbound Rule Wizard will appear. Under the Rule Type chooses Port and click the Next button:
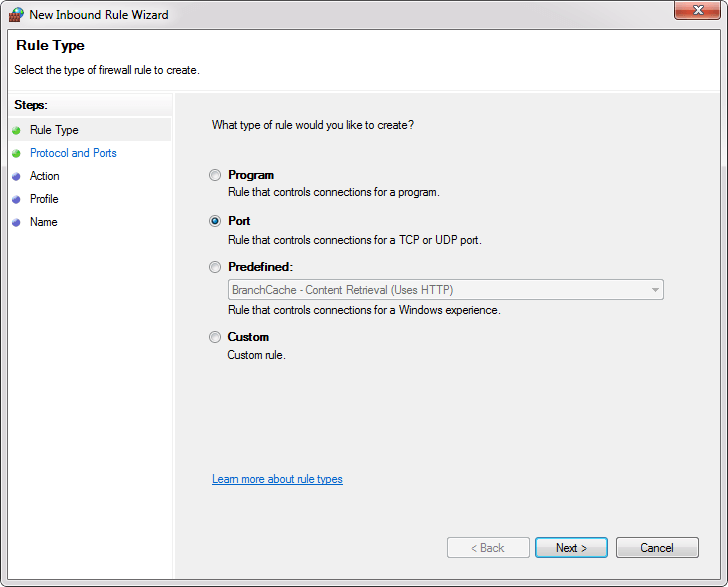
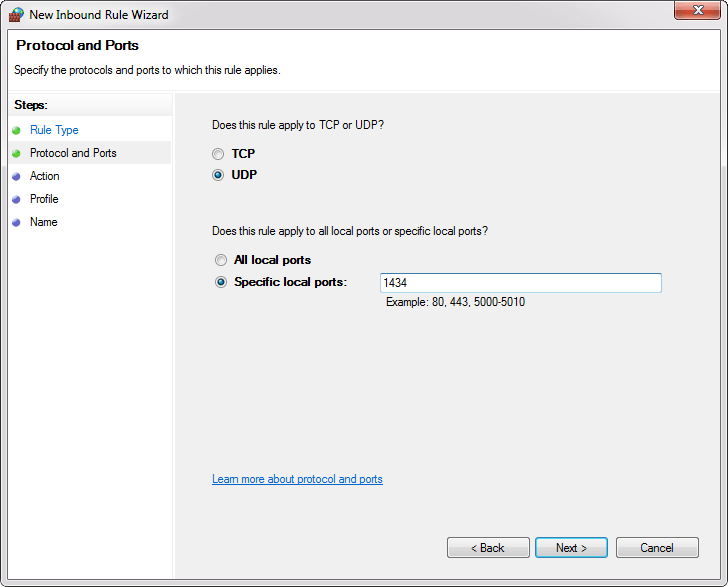
In the Protocols and Ports, there are several options that you can choose, depending on which type of protocols you select.
As we mentioned at the beginning of the article TCP is used for the default instance and named instance if is the only instance installed on the machine and default port is 1433.
- All local ports: Rule applies on all ports from the selected protocol.
- Specific local ports: In the text box you specify a port or set of ports to which the rule applies.
For this example, select the UDP protocol and in the Specific local ports enter port number 1434. To proceed with the settings SQL Browser services, click the Next button:
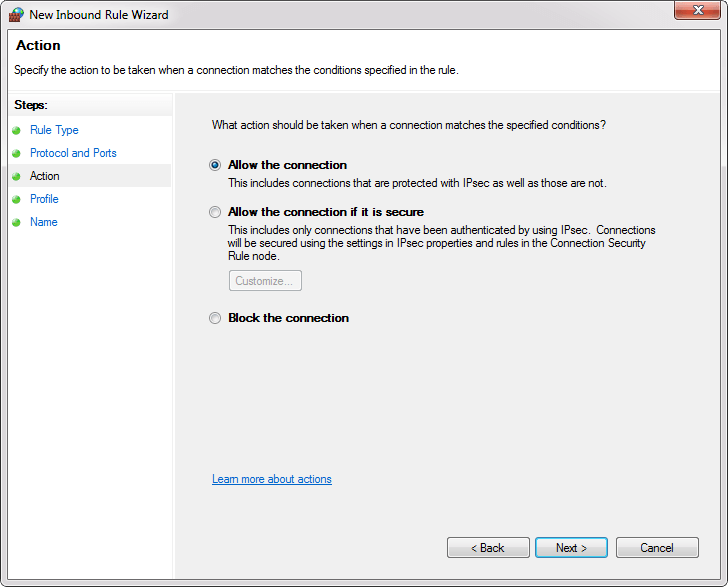
- Allow the connection: Includes all connections secure and insecure.
- Allow the connection if it is secure: Includes only connection if it is made through a secure channel.
- Block the connection: Blocks all connections secure and insecure.
In the Action dialog choose Allow the connection and click the Next button:
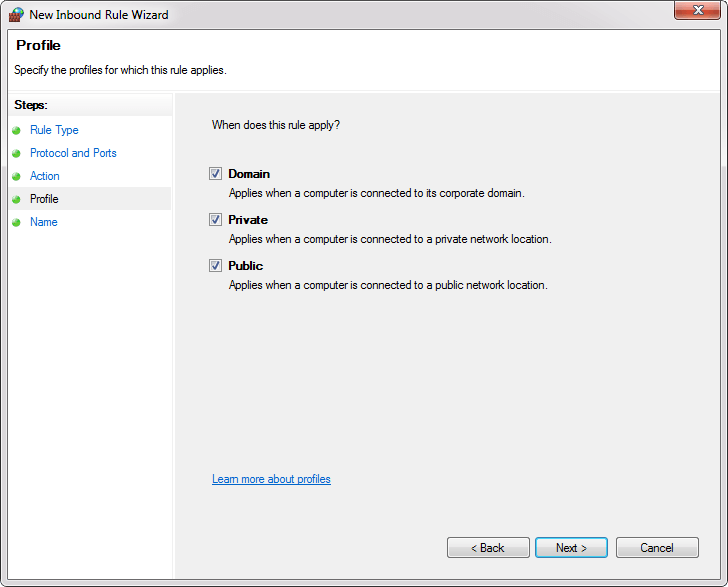
- Domain: The setting is applied only when a computer is connected to a domain.
- Private: The setting is applied when a computer is connected to a network that is identified as a private network.
- Public: The setting is applied when a computer is connected to the untrusted public network.
In the Profile, dialog chooses all three profiles and click the Next:
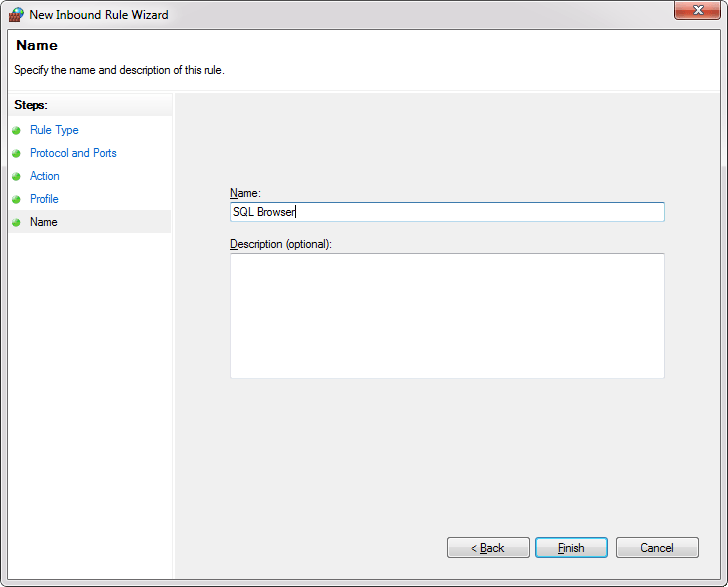
On this step give the rule a name and click the Finish.
Note: When we give the name of the rule, please write some descriptive name that you can understand later when you need to find them or edit in the Inbound Rules list.
Click on Page 3 to continue
Arjun is a Full-stack developer, who is fond of the web. Lives in Chikmagalur, Karnataka, India

